Income Tax e Verification | Income Tax Login | ITR e verify through Aadhar Card OTP | Income Tax Net Banking | Income Tax e Verification Through Bank ATM
Verifying Income tax Returns or simply ITR is an important step once it has been successfully filled. To verify the Income Tax Return, several steps need to be followed. Income Tax e-Verification is not only simple, but it also saves time. There are several ways to verify ITR. Read the article below to know in detail various approaches for ITR e-Verification and physical verification processes.
Once your return has been filled, the Income Tax Department begins processing it. After that, the next step is to verify your tax return. Returns that have been submitted and verified are processed for refunds if any. The online/electronic technique is now the best option to verify your ITR.
Apart from the Income Tax e Verification method, there is a physical way of ITR verification that requires you to mail a copy of your ITR-V.
Table of Contents
Steps for Filing ITR
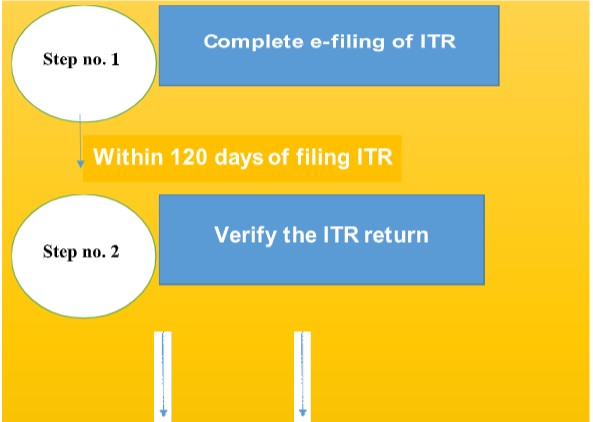
There are two steps involved in the ITR filing procedure i.e
- e-filing of ITR and
- ITR Verification
- e-filing of ITR: This refers to sending your income tax return to the Income Tax Department’s e-filing system, either directly by you or through a third party.
- ITR Verification: After filing an ITR, you must verify it within 120 days after filing.
Income Tax E- Verification Steps
If you have successfully filed your ITR and now you want to e- verify it then read the below step to know the complete step-by-step process of Income Tax E- Verification.
- First of all you need to visit the e-filing portal of Income Tax Department.
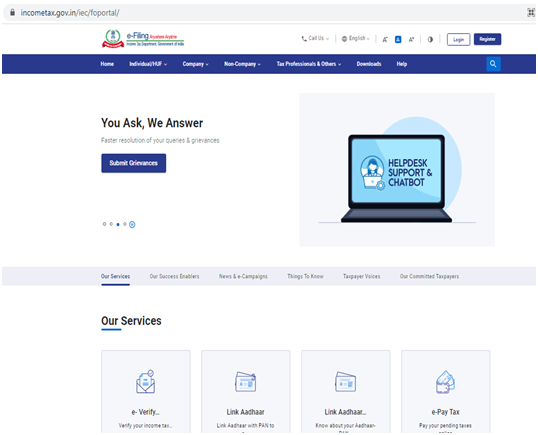
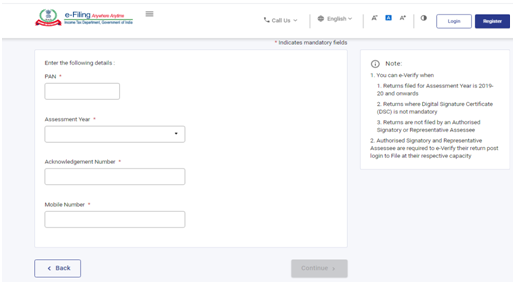
- Now on the home page, click on “e-Verify Return” under Quick Services and enter your PAN, assessment year, acknowledgement number and you received when you filed your ITR and your mobile number.
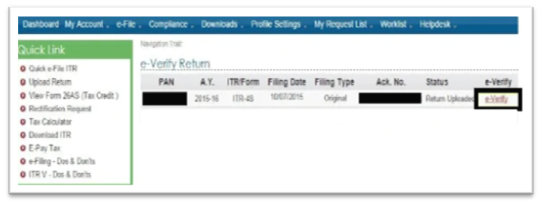
- The details of the uploaded return will be presented on the next page. To begin the ITR verification procedure, click e-verify option on this page.
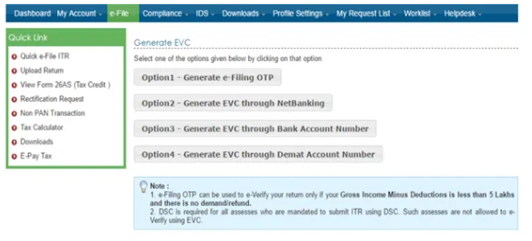
- Various e-verification code (EVC) generation methods will be presented. Using a suitable approach, generate EVC.
- Enter the code and click submit after successfully creating the EVC.
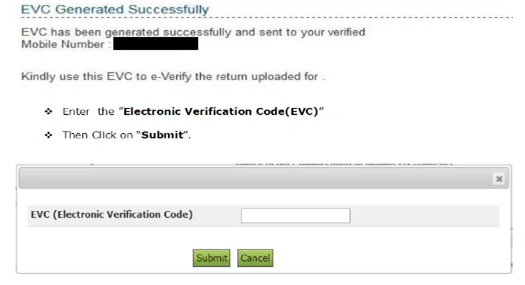
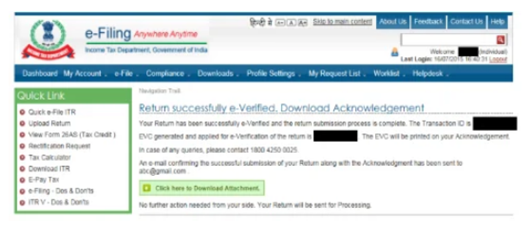
- After you submit the EVC, the message “Return successfully e-verified” will appear, along with a transaction ID. Using the green button for your record, you can download the attachment.
What is Electronic Verification Code & How to Generate EVC?
EVC stands for electronic verification code, which is a 10-digit alphanumeric code necessary to e-verify your tax return. It aids in the identification of tax filers. Individuals and Hindu Undivided Families are among the tax filers (HUF). Individuals must self-verify their returns, whereas the HUF’s returns must be verified by the Karta. Please keep in mind that your ITR submission will be void if you do not verify your return within 120 days after filing it.
Furthermore, only one EVC can be utilized to verify a single return. To e-verify an ITR, you must produce a new EVC if you modify a return that has already been e-verified.
The various ways for generating EVC required for e-verifying ITR are listed below.
Income Tax e Verification Through Net Banking
- Go to your net banking account and log in.
- On the home page, look for the Income Tax Filing tab.
- Select the e-verify option, which will take you to the Income Tax Department’s website.
- To produce EVC, go to the e-filing web page and click the “My Account” option.
- The EVC will be emailed to the email address and phone number you provided upon registration.
- E-verify your return using this EVC.
Income Tax e Verification Through Bank Account Number
Go to the Income Tax Department’s e-filing portal and select “e-Verify Return” from the Quick Links section.
- Enter your PAN, assessment year, and the acknowledgment number you received when you filed your ITR.
- Now select the e-verify option.
- Various e-verification code (EVC) generation methods will be presented. You need to click on “Option 3- GenerateEVC using Bank Account Number”.
- The screen shown below will appear to confirm your bank account.
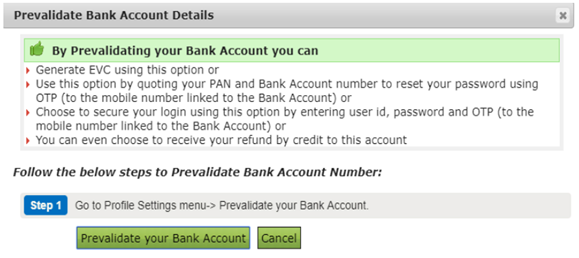
- Enter the IFSC and your registered cellphone number after selecting the bank name and then select the “Prevalidate” option.
- To receive EVC by SMS, select “Yes”.
- After successful e-verification, enter this EVC to verify your return and download the attachment.
Income Tax e Verification Through Bank ATM
To verify your ITR using Bank Atm, follow the steps below:
- Visit the bank ATM and swipe your debit card.
- Then select “Generate PIN for e-Filing”.
- The EVC will be sent to your registered mobile number.
- Now Go to the e-filing website of the Income Tax Department and choose “e-verify using Bank ATM.”
- To verify your ITR, enter the EVC.
Income Tax e Verification Demat Account Number
After you’ve pre-validated your Demat account, you’ll be able to utilize it to generate an EVC for income tax return verification. In order to verify your ITR using your Demat Account Number follow the steps below:
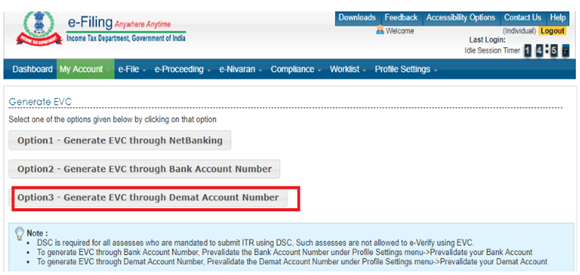
- Log into your income tax e-filing account and select the “Generate EVC” option from the “My Account” menu on the dashboard display.
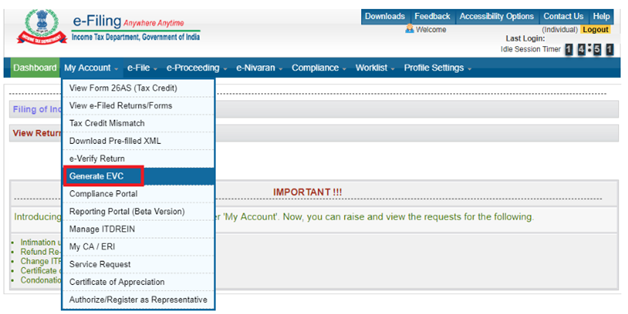
- You will be redirected to the next page after clicking the “Generate EVC” link, where you must select the “Generate EVC through Demat Account Number” option.
- On the next screen, you must confirm that you want EVC sent to your registered phone number. After that, you can use this EVC to finish the ITR e-filing and e-verification process by entering it on the e-verify returns page. If you have not yet pre-validated your Demat account, you will be directed to the following page, which will send you to the pre-validate your Demat account option as shown below:
Steps to Pre-Validate Demat Account for ITR e-Verification
PAN (permanent account number) is mandatory for registering and opening a Demat account. This is an ideal way for obtaining an electronic verification code for Income Tax e-Verification. The first step in generating an EVC is to pre-validate your Demat account. The key stages for pre-validating your Demat account are as follows:
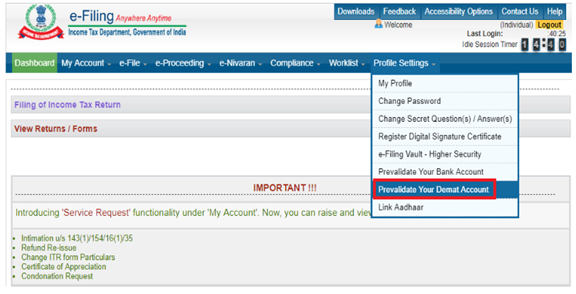
- First of all log into your Income Tax e-filing account and go to the “Profile Settings” menu in the Income Tax e-filing dashboard view and click the “Prevalidate Your Demat Account” option.
- You will be led to the following page after clicking the “Prevalidate Your Demat Account” link. Here you must fill out the several mandatory fields on this page, including Depository Type (NSDL/CDSL), DP ID, Client ID, Mobile Number, and Email ID, before clicking the “Prevalidate” button.
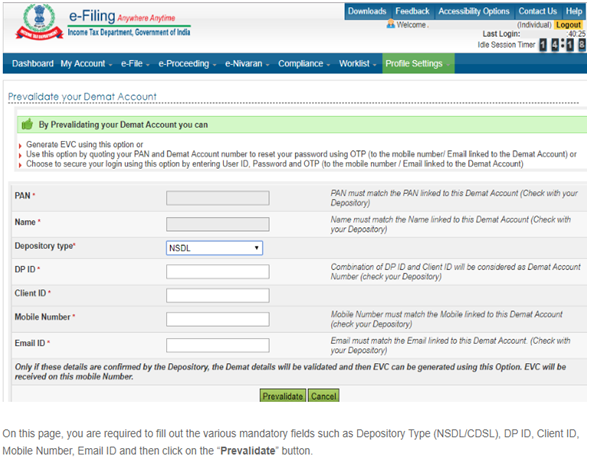
You will receive an OTP on your cellphone and email ID after clicking the “Prevalidate” button. Your Demat account will be pre-validated for producing EVC, which is sent to your registered mobile number, once you have filled things out on the Income Tax e-filing page.
Income Tax e Verification Through Aadhar OTP
In order to verify your ITR using your Aadhar OTP, follow the steps below:
- Connect your Aadhaar and PAN numbers.
- Go to the Income Tax e-filing website and click on “e-Verify using Aadhaar OTP” after you’ve linked them.
- Your Aadhaar Card’s one-time password (OTP) will be issued to the phone number associated with your Aadhaar Card.
- To e-verify your return, enter the OTP. Please keep in mind that the OTP is only usable for 10 minutes.
- After successful e-verification, you can download the attachment. Please keep in mind that this attachment is purely for your records, and no further action is necessary.
How to Verify ITR Physically?
Following are the steps if you want to verify ITR physically
- First of all you need to go to the Income Tax Department’s e-filing portal.
- Now, in order to check your e-filed returns, go to the “View Returns/Forms” option
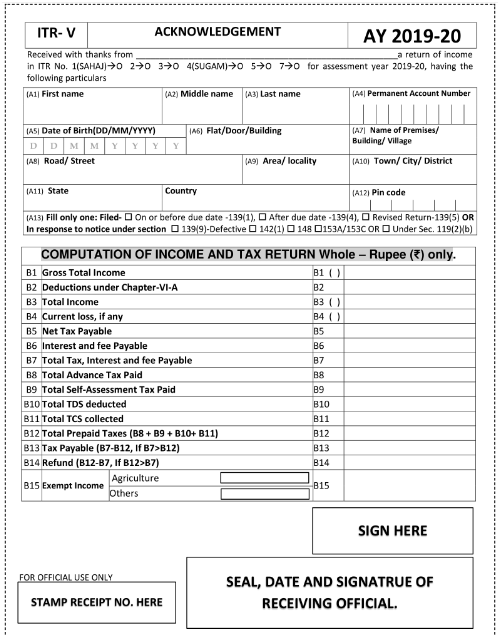
- To download ITR-V, click on the acknowledgment number and select ITR-V/ Acknowledgement.
- To open the document after downloading it, enter the password. Your PAN in small letters, along with your date of birth, is the password.
- The password will be “abcde1234501121985” if your PAN number is ABCDE12345 and your date of birth is 01/12/1985 (dd/mm/yyyy).
- This form should be printed and signed in blue ink.
Within 120 days of filing your ITR, send this form to the following address through ordinary post or speed post:
Address: Centralized Processing Center, Income Tax Department, Bengaluru, Karnataka 560500
Reason to Verify an ITR
After you successfully filed an ITR, it is important to verify it because of the following reasons:
- Your return will be invalidated if you do not verify your ITR, even if you filed it on time.
- Only once you have verified your ITR will it be processed.
- If you do not verify the ITR, you will not receive an income tax refund. As a result, if you delay the verification, the refund procedure will be delayed as well.
FAQ’s
Income Tax e Verification is the optimal method to validate your ITR because it eliminates the requirement to transmit a physical copy of your ITR-V to the CPC in Bangalore. It can be completed in a matter of minutes online using a variety of methods, including net banking, bank ATMs, Demat account numbers, bank account numbers, and Aadhaar OTP.
Sending ITR-V through the post has various hazards, such as the possibility of it being lost or delayed.
The process of validating the uploaded ITR is known as ITR verification. Your ITR will be null and void if you do not verify it. You’ll have to file a late return and pay late filing penalties in that case.
Hence it is important to verify your ITR, within 120 days of filing it. ITR can be verified both electronically as well as by sending ITR-V through the post.
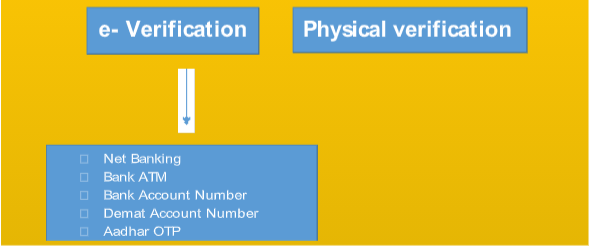
EVC can be created using the following methods:
Bank Account Number for ATMs
Aadhaar OTP
Netbanking
Demat Account Number
Income Tax e Verification and physical verification are two methods for verifying ITRs. You can do e-verification through the Income Tax Department’s e-filing portal, but you’ll need to send a copy of your ITR-V to the CPC in Bangalore for physical verification.
Electronic Verification Code (EVC) is a 10-digit alphanumeric code that’s specific to each PAN. It’s essential for ITR e-verification. Please keep in mind that you must verify your ITR within 120 days of filing it. Furthermore, only one EVC can be utilized to authenticate a single return. As a result, if you make changes to your return, you’ll need to generate a new EVC.
By entering your PAN, acknowledgment number, and captcha code, you can check the status of your ITR verification. If you validated your ITR by sending a copy of your ITR-V to CPC, you will receive an acknowledgment email from CPC.
The steps to download ITR-V are as follows:
Log in to the Income Tax Department’s e-filing portal.
To see the e-filed returns, go to the “View Returns/Forms” option.
To download ITR-V, click on the acknowledgment number and select ITR-V/ Acknowledgement.
For opening the document after downloading it, enter the password.
Your PAN in small letters, together with your date of birth, is the password.
The password will be “abcde1234501121985” if your PAN number is ABCDE12345 and your date of birth is 01/12/1985 (dd/mm/yyyy).
If your ITR-V is denied, go to the acknowledgment number and click on it. By doing so, the reason for the rejection will be revealed. For example, if your ITR-V was rejected because it was filed after the verification deadline, file a new return and verify it within 120 days of filing the revised return.
After e-verifying your ITR, you should check the status of your ITR. Your ITR will be processed after ITR verification, and you will receive an intimation from the IT Department u/s 143(1) after the assessment is completed.
Your ITR will become invalid if you do not validate it within 120 days of filing it. This indicates that you have not submitted an ITR for that fiscal year and will be required to file a late ITR with penalties.
If you were unable to verify your ITR on time owing to a real reason or hardship, you can make a condonation delay request through the IT Department’s e-filing website.